The Best Way to Learn Guitar: 12 Step Guide

Learning to play guitar is tough, challenging, and frustrating. It requires a ton of patience and countless hours of practise. Avoid mistakes and pitfalls with these 12 tips that will teach you the best way to learn guitar.

Introduction

So you want to learn to play guitar? Maybe you just picked one up (if so skip Tip 1), or you are thinking about buying one? Either way follow these 12 tips and you should be on your way to learning guitar in the quickest most efficient way possible!

Learning guitar is like finding your way through a maze. There are lots of different methods out there, many different routes you can take, but many of them lead to dead ends. Learning from a teacher is like having a personal guide through that maze, once they know where you want to go they can show you the quickest way through.

That's why most importantly, we recommend from learning from a teacher. Learning from a guitar teacher is the key to learning quickly, avoiding any mistakes, and not plateauing. This article is designed to help you as much as possible but nothing can beat having an actual teacher.

There are so many different methods out there, and it can be hard to know which one will work best for you, that's why we wrote this article. We wanted to keep things simple and make your learning as easy and straightforward as possible. If you search up the best way to learn guitar you are going to be inundated with millions of different options. Whichever route you take, we recommend that you are patient, set goals, work consistently towards those goals (like setting a habit of playing a certain amount each day), and keep at it!


So without further beating around the bush, here are our 12 Tips or Steps on the best way to learn guitar!


If you want to speed up the guitar learning process and journey, we have world class guitar instructors available for private online guitar lessons available.


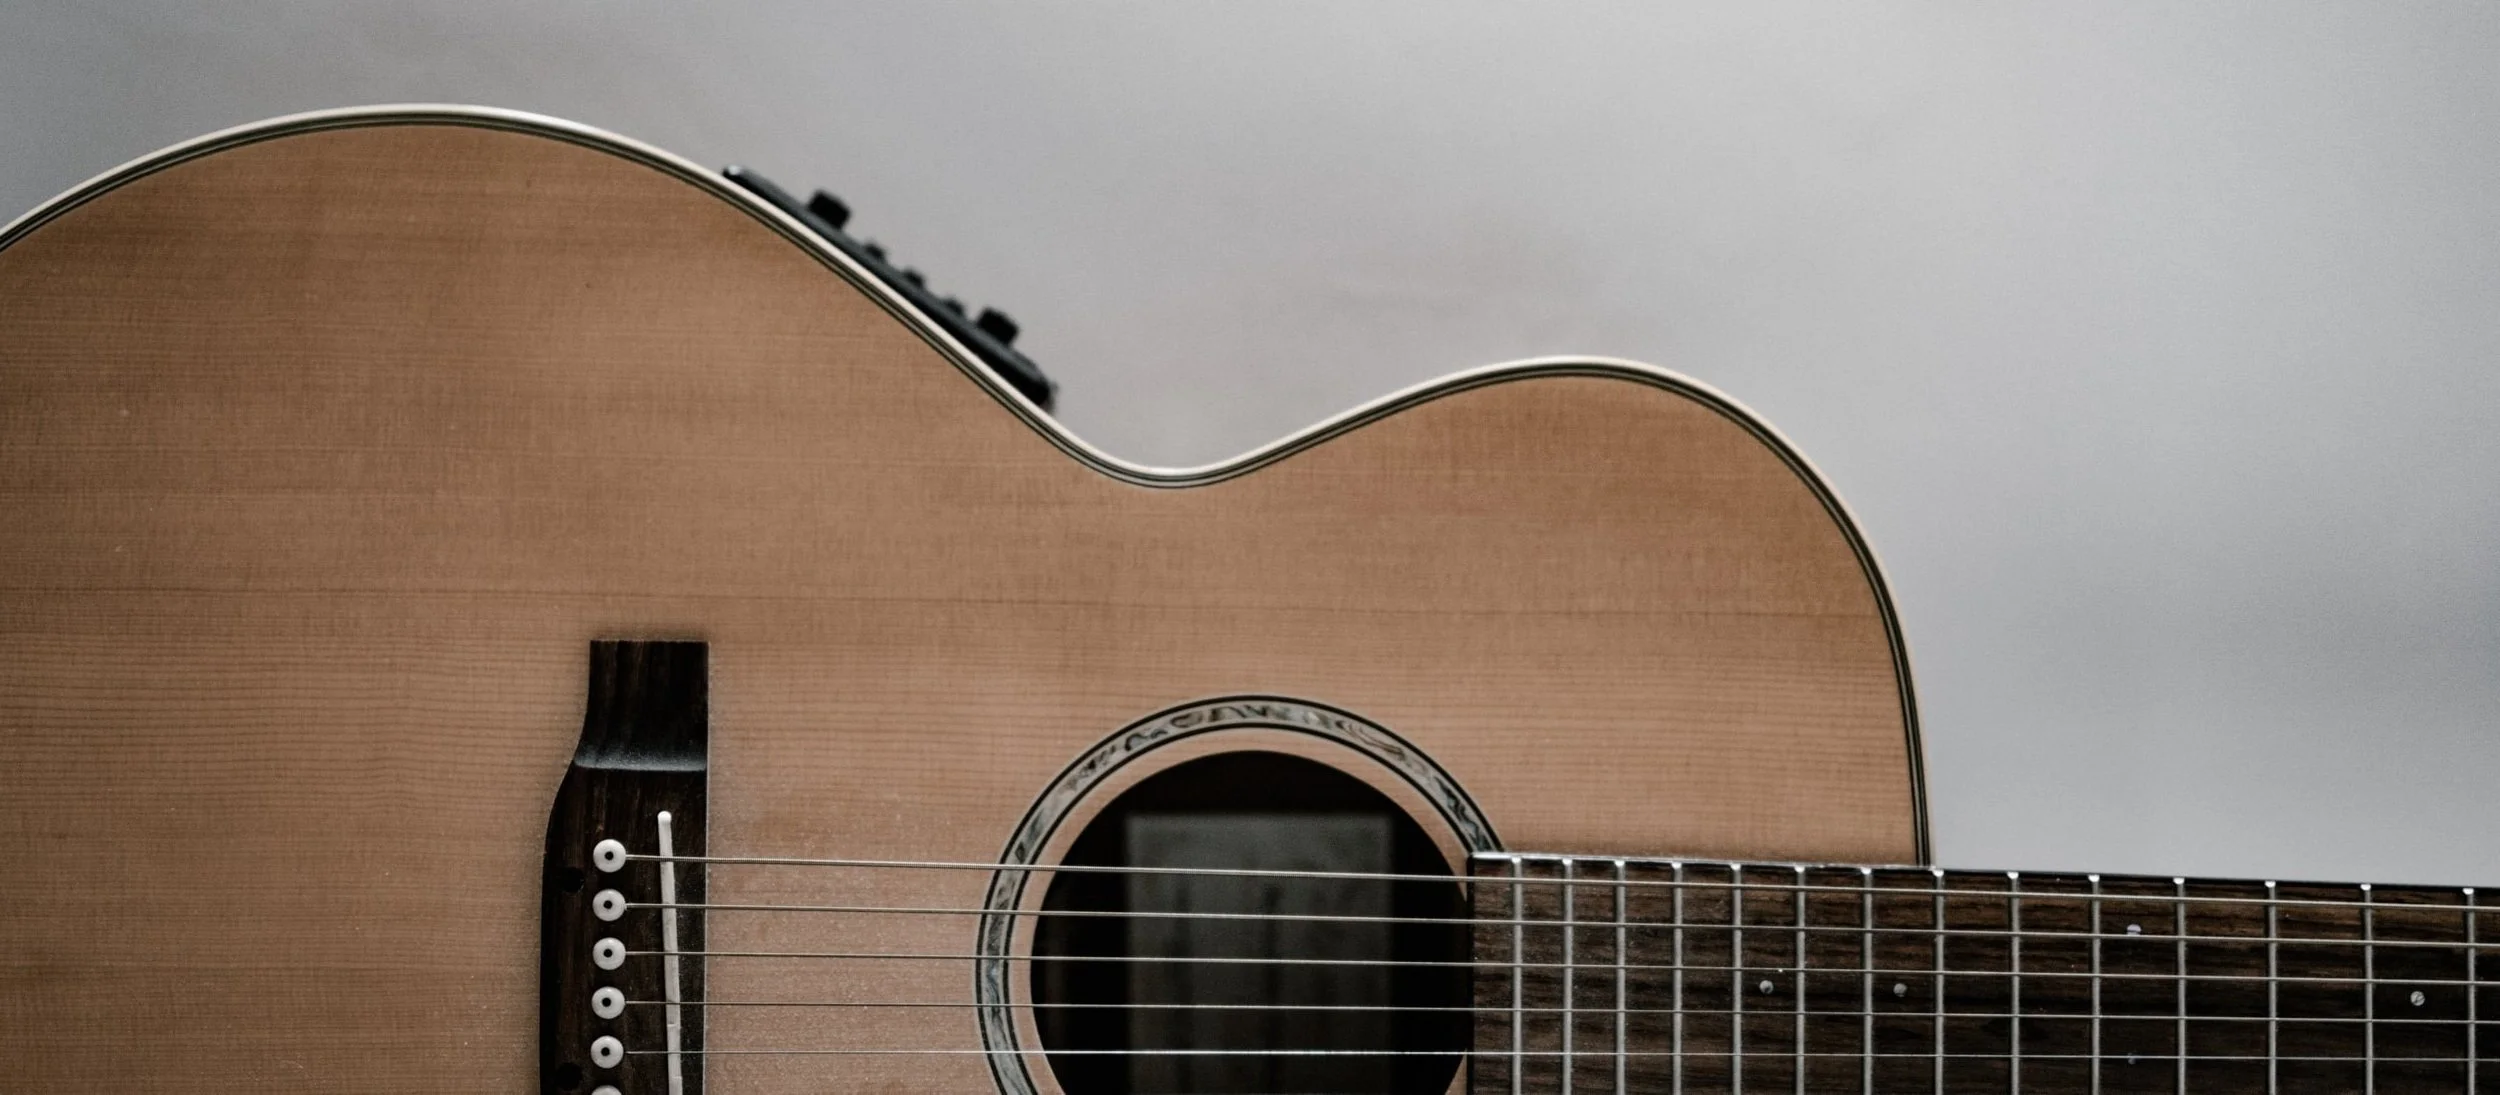
Get the Right Guitar

First, decide what style you want to play, and find out what types of guitars are used in those styles. For example, if you are playing folk, an acoustic guitar is your best bet, if you want to learn metal an electric guitar is the best option. Also do you want to play regular guitar or Bass?

An acoustic guitar will give you a great sound for most styles (excluding rock and metal) and you can take it anywhere with you. Playing guitar around a campfire is a really great time. If you want to

Try different types of guitars that are suited towards your the style you want to play. People will often buy a cheap guitars when they start playing, but if you get a total piece of junk you it will be way easier to loose interest. Conversely based on budget it may not be the best option for you to buy the most expensive one you can find. In the end you don't want to get stuck with a guitar that's not suited for your needs.


Be Patient

Once you have a guitar and have decided that you are going to learn how to play, at the beginning of your guitar journey, it's important to make a promise to yourself to be patient. Patience is key, it's going to take you a long time to learn how to play, and you have to forgive yourself for taking a while to get there. Remember to enjoy the journey, because even though it is awesome when you get there, getting there is just as much fun.

Remember to stay patient and take your time. Learning any instrument can be difficult, especially learning guitar, but make a pact that you won't get discouraged! Remember, you will be following a learning curve, and it's something every good guitar player goes through. The key is to stay persistent in practising each day; over time you will become more experienced and as your skills grow, the better your playing will sound.


Set Yourself Up to Win

If you truly want to learn how to play the guitar, it is very important you set yourself up to win. That means planning your guitar learning process, and setting habits that will get you there. Once practising becomes a daily habit it's like you put your learning on autopilot.

The first thing you should do, is figure out what you want to learn. When you have "learned to play the guitar" (We say this objectively because you never really stop learning guitar), what do you want to know? What do you want to be able to play? Who do you want to sound like?

For example, I want to be able to play 20 AC/DC songs, I want to be able to improvise solos like Angus Young, and I want to Sound like Angus Young.

The next thing you should do is figure out how much time you can dedicate to practising each day. The more, the better! You don’t need hours and hours of practice every single day (although it would be awesome if you could!), at minimum you should be practising 10 minutes a day, but if you can't, 15-30 minutes a few times per week is ok, but most optimally 30 minutes a day will help tremendously with your progress.

The next step is to create a plan that outlines what you need to learn, and in which order. This way it is much easier for your brain to absorb the information because there is no guess work on how things should be learned.

Don't just write out a long list of skills you want or need to learn; this will get overwhelming very quickly, but rather organize that list into categories and set goals and deadlines for when you will learn those things by.

For example:

  • Learn how to strum 8 different pattern and get comfortable with strumming by the end of the Month

  • Learn the D Chord by the end of the week, Learn The C Chord by the end of next week, Learn two more Chords by the end of the Month

  • Get comfortable with switching between each of those chords by the end of the month

  • Learn the basic chords / chord progressions in G Major, Emaj and C major by the end of the year


If you truly want to learn how to play the guitar, it is very important you set yourself up to win. That means planning your guitar learning process, and setting habits that will get you there. Once practising becomes a daily habit it's like you put your learning on autopilot.


The ultimate goal is to have a step by step plan that leads you from being an absolute beginner up until becoming masterful at playing your chosen instrument. With this process of setting yourself up for success, you will have a much better chance of achieving your goal.

Having a teacher help you, will help you to set these goals in an achievable and realistic way.

In the beginning it is important to stay motivated and committed so be sure to set small goals that can help keep you on track with practising each day. Once these habits are established then more challenging tasks should also become easier as well because they will eventually just seem like another normal part of your practising.

You should set yourself up in a way that makes it easy for you to succeed and stay focused on the end goal of being able to play songs, improvise solos or be band ready! If you want something bad enough then nothing should stop you from achieving it. You just have to learn how to set yourself up to win.


Start with the Basics

Starting with the basics gives you a solid foundation to grow from. It's like building a pyramid, each level you go up is only as strong as the foundation below it. It may not be as exciting as learning to play a solo or strum the chords of a song, but learning the basics will help speed up learning in the long term once you know your way around the instrument.

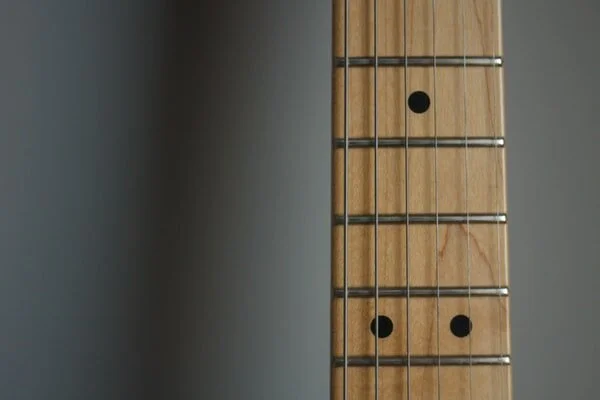
Learn the parts of the guitar

First you should learn the parts of the guitar, there are many resources you can find online which will help you with this. This is a sure way to understand what your teacher or source for learning is telling you to do.

Learn how to set up a guitar

Next You should learn how to set up a guitar. Learning how to tune your guitar, how to keep it in good working order, and even restringing it and doing basic maintenance will help you sound good when you play and help you stay motivated.

Learn how to tune your guitar

Once you know how to set up your guitar, you should learn how to tune it. Tuning the strings of a guitar can be tedious, especially if you're new to it. Try using an online tuner or buying a good electric tuner. In time as your ear develops you can learn to tune by ear. All you will need is one reference pitch, but that's for when you get more advanced. It's also important that you always double-check your tuning before you start playing.

Learn how to hold a pick correctly

Next you should learn how to hold a pick correctly. Learning to hold a pick correctly will prevent fatigue or injury to your picking hand and enable you create better sound. You can find resources on the internet which can teach you to hold a pick.

Learn how to Strum

After you learn it's a good idea to learn how to strum. Strumming though a very basic movement, can be very tricky to learn, so it will take you some time to get the hang of it. There is more about strumming below.

Learn to actually play notes

Once you know how to strum, it is important to learn how to actually play notes on your guitar. This is where you place your fingers on the fretboard and strum a string or strings to play a note or notes. The notes should clearly ring out.

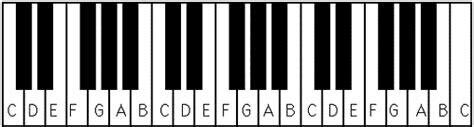
Learn the names of the guitar strings

Next you should learn the names of the strings, and learn the notes on the fretboard. This can help you identify notes quickly and help you with learning guitar later on. This will set you up for more advanced things like sight reading, reading tablature, or even improvising and learning scales.

Learn Chords

This next section, learning to play chord shapes is optional if you are going to get a guitar teacher. If you are going to get a teacher there isn't any need to master this step as a teacher can guide you through this process and even make it easier.

After you learn how to strum, then the next thing is to learn chords and learn chord shapes and where they are on your guitar(again optional if you are going to get a teacher). It's important that you know this even if it isn't something new (if you already understand and read music) because knowing the chord shapes, and knowing what notes make what chords and shapes, makes making music significantly easier.


Get a Guitar Instructor

Finding a guitar teacher (someone who can teach you how to play) is one of the best choices you can make if you want to learn how to play guitar properly and quickly. As a matter of fact in our opinion it is the best way to learn guitar. As we said above, learning guitar is like finding your way from point a to point b in a maze. There are lots of different ways to get through, many different routes you can take, but many of them lead to dead ends. Learning from a teacher is like having a personal guide through that maze, once they know where you want to go they can show you the quickest, easiest, and smartest way through.

Guitar lessons with a teacher is one of the best, most efficient ways to become a better guitarist. A teacher won't let you make mistakes, they will correct your bad habits before they become ingrained in your playing style. They can help you develop a practice schedule that's best for you - depending on what kind of music you want to play, and how quickly or slowly you want to get there.

They can get you quickly to your goals. Do you want to learn how to read music or tabs? Do you want to fully understand the fretboard? And most importantly, they can teach you what is best for your playing style: finger picking or strumming? Classical guitar or flamenco? Blues or jazz ?

Also, taking guitar lessons from a teacher will allow you to ask questions and get answers quickly which you may not find online. If they are a good teacher then their job is to help you learn the guitar in whatever way works for your own personal style of playing, so make sure that before you start taking lessons with someone (especially if its expensive) make sure you know a bit about their teaching style and find out what they focus on and if it seems right for you.


If you think learning from a teacher is right for you, LectureOwl provides private online guitar lessons with world class teachers. You can see our guitar teachers available here.


Practise Strumming

Learning how to strum properly is one of the most important things you can learn on the guitar. Strumming is how you express yourself, how you annunciation notes, and create dynamics, especially if you are playing acoustic music or playing songs with a clean sound (without distortion).

Learn how to play with different strumming patterns. Strumming is an important part of playing the guitar because it can helps keep the beat and can make your songs sound better. You should practise as many different strumming patterns as you can, both strumming all of the strings at once and strumming one string at a time. It is also good to practise strumming each individual string by itself, as each is in a different location and will take some practise to get comfortable with. For example you would start by strumming the low E string, going through each pattern and working your way up to the high E string.

Here are some examples of common strumming patterns it is good to practise:

Strumming (all of the strings) and (one string at once):

(Each one of these can be repeated until you are comfortable with them.)

  • Down, Down, Down, Down,

  • Down, Up, Down, Up,

  • Up, Up, Up, Up,

  • Down, Down, UP

  • Down, Up, Down, Down,

There are many more patterns you can work on, and you can get creative and come up with your own once you master these. Once you have mastered individual strings, the next more advanced step is string skipping. This is when you switch from one string to another, for example strumming the low E string a couple of times, switching to the A string for a strum and back up to the E string.

E (Down), E (Up), A (Down), E (Up)


An essential tool for improving your strumming, and for overall practise, is playing with a metronome. If you don't have a metronome you can use your phone. There are hundreds of free apps that will allow you to play with a virtual metronome - no need to buy an expensive device.


Practise Changing Chords

As mentioned above in the basics, learning chords and chord forms is very important as most music is chord based. It is also important to learn how to switch between chords smoothly. This will not happen overnight and will take some practise but there are techniques that may help speed up the process.

Once you have learned two separate chords, you can practise by switching between the two. Strum the first chord for a count of four, then switch to the second and strum it for a count of four, then switch back.

It may be super annoying and challenging at first, but keep practising those chord changes. Over time you will find that you get much better and you will find songs more enjoyable and exciting to play. Another good tactic, and the next advanced step, is learning how to play chord progressions.

Chord progressions are a grouping of chords which when played in order make up the backbones of most music. For Example C, G, E, D.


Learn Songs

Another way to improve quickly and help you stay motivated is to learn songs.

Think about the songs that inspire you and that you want to learn to play. It's much easier to learn how to play guitar when you are motivated by music. Try picking out parts of different songs that sound interesting, and then try learning those techniques. Learning music theory is also very valuable because it can give you a better understanding of the different scales and chords that are commonly used.

Start out with some basic songs, your teacher can help you pick something out if you don't have something in mind already. Once it is possible, practising playing along with your favourite songs can be an excellent way to learn new techniques and become better at the instrument. This is also helpful because it will help keep your motivation high since you'll enjoy practising more when your favourite music is involved.

If you aren’t going to get a music teacher and don’t know where to start, Strummingly has a list of 39 easy guitar songs for beginners.
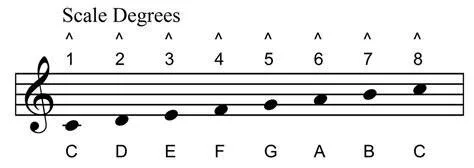

Practise Scales

The next step, and a very important one if you want to become a guitar virtuoso, want to learn how to improvise or play solos, and want to get a better understanding of music is to learn and practise scales. Scales are a very important part of music and learning music theory will help you here.

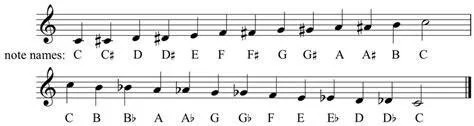
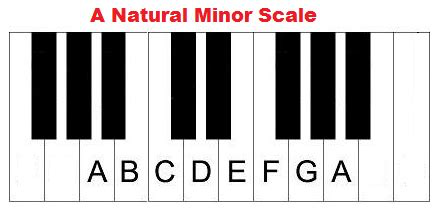
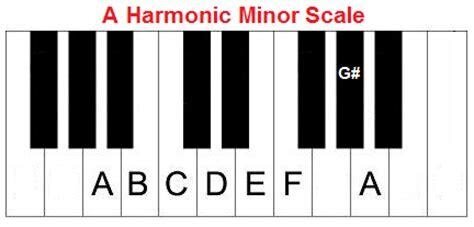
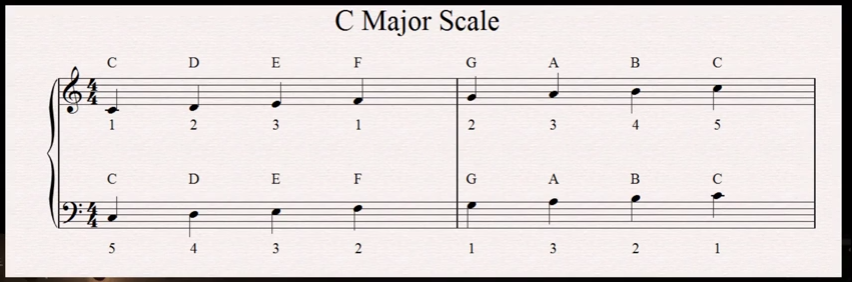
Learning different guitar scales can also be a very useful tool for improving your technique. There are many types of guitar scales, but the most common and most popular is a major scale. Think of a very happy upbeat song, think Disney, that is most likely a major scale. Another really popular scale, and the same scale but just starting from a different note is a minor scale. A minor scale sounds sad, dark, scary or melancholy. A lot of metal music and sad songs are based on major scales.

If the sections about a major and minor scale being the same but starting from a different note confused you, don't worry. It can be a bit of a challenging idea to get at first. An example is a C major scale has the same notes as an E minor scale.

At it's most basic a scale is a group of notes that a passage of music is made from. You can learn more about scales here.

Once you become more advanced you can practice playing in different keys. Changing the key of a song can be difficult when you first start out, but it's important to learn how to do this if you want to keep learning new songs! If you are struggling with changing between all 12 possible keys, try starting with some easier ones like C and G major.


Learn to Improvise

Once you know how to play scales and chords, learning to improvise is pretty easy. Basically you are just playing notes, melodies or chords within the confines of a key, or scale. Once you get more advanced you can experiment leaving the confines of a scale or key, but for now that's the safest place to be.

The best way to learn how to improvise is simply by doing it. Once you know the scales well enough, try playing them in different ways and come up with your own melodies over chord progressions that you like.

Another very helpful tool for learning to improvise is a backing track. A backing track can be something as simple as listening to music without lyrics, you can also find backing jam tracks on youtube, if you are learning from a teacher you can get them to play a backing track for you while you improvise.


Play with Others

Playing guitar along with others will push your ability further because it requires thinking quickly about chord progressions, melodies and harmonies. It can also be a great way to get feedback from others about what mistakes you might be making, or some cool techniques or things you can try out.

Once you start jamming with your friends or family members, you will find your learning progresses at a much faster rate, because you are getting the chance to try things out in real time. It can be helpful for each of you learn the same stuff before playing songs with each other so everyone is on the same page musically.

Once your skills improve you can even try playing in a band. There is a really magical feeling when you are playing along with a group of people and you guys are making magic.


Keep Practising

The final and most important tip on the best way to learn to play guitar is to keep practising. Every time you practise it's like laying a brick in a pyramid. Over time you will find that you've built something magnificent. The great thing about learning guitar is that once you get good, it's a skill you will always have.

So make sure you commit to keep practising, If you can stay dedicated in practising for at least 30 minutes each day you will be an expert before you know it. The only caveat here, is that you have to also make sure you are always learning new things.

If things ever feel too hard or frustrating just remember that every professional musician went through this and eventually got better at their instrument. Every pro musician had to work through this, and the better they are, the more work they put in. Keep doing your best, even when you aren't making any progress.


Conclusion

Thanks for reading our guide on the twelve steps on the best way to learn guitar! All the stuff listed above will get you started learning the guitar and in our opinion is the best way to begin your guitar journey. There are many other things that can really help, like learning to read music and studying theory. The more you know about the instrument and music in general, the easier it will be for you to learn new techniques, songs and work your way around obstacles when they arise while playing guitar.

The most important thing is that you keep playing every day and don't give up on your passion for the guitar. Think of all those people who say they will never be able to learn guitar. They never will because they stopped trying. Keep going even on the crappy days and you will find yourself playing your favourite songs in no time, with a big smile on your face. So keep playing and keep doing your best, even when you aren't making any progress.


Singing Lessons - Where to Start

INTRODUCTION

Ah! Another day, another trip to the fountain of knowledge that is Lecture Owl. And what’s on the menu today? Well I hope you’ve got a serious appetite for knowledge, because today I’m serving up a seven-course taster menu all about singing lessons!

We’ll be covering:

  • What kind of person might need singing lessons

  • Where to find said lessons

  • How to work out which teacher is right for you

  • What sort of prep you might need to do before beginning lessons

If that all sounds good then pull up a chair and I’ll be your musical waiter – Bon Apetit! 


Want to learn way faster and avoid any pitfalls? Try a free in-person online lesson from one of our world class instructors today.


WHAT KIND OF PERSON MIGHT NEED SINGING LESSONS?

It’s a good question, and the answer is…

You could be almost anyone! 

You might be incredibly experienced, and looking to brush up on your knowledge, or ‘sharpen the saw’. You might be a total novice with no prior experience whatsoever of singing! You might be somewhere in between. You might be someone who has always enjoyed singing, but has never quite had the courage to formalise your learning – maybe you’re worried about reading music notation? 

These are all really typical starting points and all TOTALLY GREAT places to begin!

The amazing thing about getting singing lessons is that you make yourself accountable. This happens because:

  1. You’re parting with your hard earned money, and you want to get as much value as possible

  2. You’ve invited someone else into your journey – you’re teacher. They can help you to see progress, motivate you when you’re feeling uninspired, and open up new pathways and possibilities

The bottom line is: if you’ve started thinking about getting singing lessons, it’s probably time for you to get singing lessons.


WHERE’S A GOOD PLACE TO FIND SINGING LESSONS?

Well, gentle reader, it has to be said that you’re actually already at one of the best locations you could hope to be at to find your dream teacher! 

Why not have a quick click here and take a look at some of the incredible voice teachers that Lecture Owl has to offer? 

You’ll find a whole range of teachers who cover a whole variety of styles to meet your price range, and the best bit? You can do it from the comfort of your home! Ideal right? That means that you could be based in Nepal, Nairobi, or the Nederlands and still have access to this incredible squad! Wild!

Here is a list of our recommendations for finding great singing teachers:

Of course we understand that some people may want to go to lessons ‘in person’ (or at least they might want to in the near future). If that’s you, here a few suggestions for finding teachers in your area:

  • Check out the ‘advertising’ section of your town or city’s local newspaper – as well as their online equivalent. Lots of singing teachers advertise using these resources!

  • If you have a choir group that’s local to you, ask if any of the singers there teach. FYI joining a choir is one of the VERY BEST things you can do alongside getting a teacher to improve your singing.

  • It can also be a good idea to look out for flyers and leaflets at your local libraries, grocery stores, or transport stations – more key locations that singing teachers tend to advertise!

HOW TO KNOW WHICH TEACHER IS RIGHT FOR YOU

Well this part should be quite simple! 

First off, when looking at singing teacher’s adverts, you’ll probably notice that they will mention a specific style that they teach. This might be:

  • Classical

  • Pop

  • Country specific (e.g. Latin or Celtic)

  • Or a whole host of other styles

The next step is to identify which style most suits you and then approach the teacher. It’s a good idea to identify a few potential candidates that could be right for the job, as lots of singing teachers calendars can get quite booked up.

Then ask the teacher if they could potentially give you a free trial or starter session. You’ll notice at the Lecture Owl singing page that all of the teachers offer this sort of trial – it can be a real godsend to have the pressure taken off when finding someone to work with. If they don’t offer the taster, unfortunately that’s just too bad. Depending on the credentials or esteem of the teacher, you may still want to go ahead, but no one would blame you if you chose not to.

After your trial (or first) lesson, simply let your teacher know what you thought of the class, and if you’d like, to book in again! A great tip for scheduling is to – where possible – keep the same appointment every single week. I can’t tell you what a difference this makes! Believe me, just having that little bit of sacred space will make the world of difference in your practice.


WHAT SORT OF PREP TO DO BEFORE BEGINNING LESSONS

Before your lesson, it’s a really good idea to practice a song – if you have one – that you feel best shows off your vocal range & qualities. It should also be one in the style that you’d most like to sing in. Then sing this to your (potential) new teacher!

There’s no point taking multiple songs along, it’s best just to show the teacher the way you sing now, and give them an idea of the kind of singer you’d love to be!

A good thing to prep before the first lesson is also a few singers that you’d love to sound like, or really respect. That could be Charlotte Church, Arianna Grande, Elvis, Pavarotti! It really doesn’t matter – just give your teacher a little bit of inspo about the sort of direction you’d like to go.

It’s also a really good idea to have a few questions prepared before meeting your new sensei! For instance:

  • Do they teach using grades/examinations?

  • Do they cultivate any opportunities for performances/peer interaction?

  • Do they teach using a specific methodology?

It’s really good to remember that a really good singing teacher may well be your teacher for the rest of your life! Properly done this can be a really special relationship that you’ll come to appreciate for a very long time!

AND SO…

And there you have it! A rather brass tacks guide to help you choose a singing teacher! 

Let us know how you get on, and remember that some of the best singing teachers available on the Internet can be found at this very site.

Take care! And see you again next time!


Gavin Swift is a film and media composer based in London, England


8 Tips on How To Improve Your Singing Voice

By: Karliana DeWolff

Introduction

So you want to improve your singing voice, well you’ve come to the right place. Below you will find 8 tips to help you improve your potential as a singer. First things first, if you are just starting out, we have some good news.

A secret that many musicians know is that nobody is really unmusical, and though a lot of people will say they are tone deaf, it’s highly unlikely that that is actually the case. Many people just haven’t had an opportunity to put in the time or practise that is required, alongside not having learned all the tips and tricks that makes it easier to do so. So if you are just beginning your journey as a singer the tips below will be a good jumping off point. Or if you are already an intermediate the points below should be a good refresher.

The cool thing about singing is that everyone is born with a different voice and different vocal range. The key to becoming a great singer is learning how to improve your individual singing voice and learning to work with the tools you already have in your tool box. With the right mix of balance, coordination, and exerise, you can achieve breathtaking sounds, ideal vocal tones, strong vocal muscles and relative pitch

In this lesson we are going to cover:

  1. Posture

  2. Confidence

  3. Using your strengths and finding your own style

  4. Vocal Warm-Ups

  5. Breath work & Diaphragm Support

  6. Loosening up the Face

  7. Taking Care of your Vocal Chords

  8. Practise Practise Practise


Now, before we continue on with the lesson, we are going to go more in depth on your voice as an instrument. If you are feeling impatient and want to get to the tips, feel free to scroll down to them, otherwise, read on!

The most convenient thing about your voice having the potential to be an amazing instrument is that it is within you. You don’t need to break your back lugging heavy gear into a van or about getting it set up on stage, you don’t need to keep it in a bag, or keep it out of the rain. One of the most moving instruments in the world is sitting right within you and it’s begging to be improved.

One of the biggest misunderstandings that a lot of people have is that they think that the singing voice is something beyond their reach. They think that people are just born with it or have a special gift, in truth, it’s just about learning smart, and practise, practise, practise!


unsplash-image-b_-KVgWg_YM.jpg
 

8 Tips on Improving your singing Voice

  1. Posture:
    Believe it or not, good posture is an unbelievably important part of becoming a better singer. One must be relaxed, but also must stand as straight as possible - imagine you’re a ballerina or a foot guard in front of Buckingham Palace! The straighter you stand, the clearer your airways will be to allow that sweet, sweet music to make its way out of your mouth. 

  2. Confidence:
    More than anything else, confidence can make or break singers at any level. Knowing you are capable is half the battle! Before a performance or rehearsal, engage in positive self-talk or exchange compliments with a fellow singer. 

  3. Using your strengths and finding your own style:
    You do NOT need to sound like Celine Dion or John Legend to be a strong singer! Developing your own voice and style makes you an unique asset, whether that be for choral work, solos, or professional pursuits. Letting your own voice shine through will sound far more authentic than any form of imitation - however flattering that may be. 

  4. Vocal Warm-Ups:
    Before you break into your own rendition of “Don’t Stop Believin,” it is important that you warm up! Pull up to a piano or find a piano app on your phone to get you started with some basic scales, triads, and arpeggios. In addition to singing, it’s also essential to consider some spoken vocal warm-ups such as reading aloud, tongue twisters, and making your way through all the vocal resonators. 

  5. Breath work & Diaphragm Support:
    In accordance with warm-ups, you must also ensure you are taking in plenty of air! Breath work and ample diaphragm support (singing from your lower abdomen) are crucial in developing a strong, clear sound. 

  6. Loosen up the face:
    Before you sing, make sure the muscles in your face are relaxed. If things stay too tight, your voice might not sound as lovely as it’s capable of being. Try massaging just under your cheekbones, as well as under your jaw and lightly under the eyes. For a more in depth description, check out the video below for a great tutorial on facial massage.

  7. Take care of your vocal chords:
    Stay hydrated, get lots of sleep, and don’t strain your voice too much! Let it rest so you can sing your best.

  8. Practice, Practice, Practice:
    Sing every day! (And more importantly, sing what you like.) The more you love something, the more you’ll want to practice - and the more you’ll improve. 


Karliana DeWolff is a school teacher and theatre performer known for her amazing voice


How to get better at singing

By: Gavin Swift


Greetings LECTURE OWLS! And welcome to another thrilling instalment of ‘Articles to Improve Your Musical Life’! I’m your host, Jiminy-Bow Christmas, and by golly have we got something special in the tank today!

Picture this scene:

You’re at your local karaoke bar. Your pals are all up on the chairs; positively howling the lyrics to Someone Like You & Wonder Wall. They sound bad. I mean my god they sound absolutely abysmal. Flat. Croaky. Like a drunk police siren. 

Your turn. 

Your friends spur you on [“come on Jiminy!”]. You step up to the mic, whack on Don’t Stop Believing by cult rock band Journey, and even though that song has been so incredibly overdone since the 2009 series Glee, you absolutely SMASH IT OUT OF THE PARK. You sound incredible! Like if Adele and Ariana Grande had a baby! And then that baby had a baby with Stevie Wonder

“How on earth did you get so good?!” your friends think!

And of course, the answer is that you read this article and got some serious big daddy tips on HOW TO GET BETTER AT SINGING.

So sit up, be alert, and get ready to take notes – we’re about to take your singing game to a whole new level. Get ready to enter the karaoke hall of fame.

In this article we’re going to:

  • Learn how to improve our singing!


Want to learn way faster and avoid any pitfalls? Try a free in-person online lesson from one of our world class instructors today.


WHAT IS SINGING ANYWAY?

I’m sure we all know this, but I think it’s great to go back to first principles and really define what it actually is that we’re aiming to improve at before we start chucking in techniques and exercises willy-nilly. So what is singing? 

Well, the Oxford English Dictionary defines it thus:

“The activity of making musical sounds with the voice, usually a tune with words”

Pretty well sums it up right? But I’m angling for something a bit deeper, so lets go ahead and define that word ‘voice’:

“The sounds that are made when people speak or sing”

Lol. Cheers for that illumination Oxford.  Should’ve gone to Hull.

So let’s get the first entry for the Hull English Dictionary written:

The voice: sound created through the mobilisation of breath in the body combined with manipulation of the vocal organs, namely the vocal folds, resonant cavities, and lips to create words, sounds, or song.

Alright alright alright. 

We inhale; fill our lungs, then on the breath’s way out, we consciously control the air and our vocal folds (cords) or other resonating passages. From this we create sound either for speaking or singing. 

When we want to improve our singing then, this is the place that we start. I promise you this, tweaking your breath alone can make SUCH a huge difference. 

So, to maximise the breath, let’s learn how to breathe!


BREATHING POSTURE

“I mean surely this is self-explanatory?”

Well you’d think so wouldn’t you? But alas mon amie, modern life has conspired against us. You see, good breathing begins with good posture. That means get your shoulders back & your spine straight (ish). But here’s the thing! 95% of children, teenagers, & adults spend a massive amount of their time sat at desks hunched over their computers! To make matters even worse, when they are standing, they’re often hunched down over their smart phone texting! So their spines curve & they’re shoulders hunch.

How to sing better Lesson - LectureOwl - guy in chair.jpg

“Big deal!” I hear you say – well it is I’m afraid!

Let’s try something right now. Wherever you are, sat down or standing, I want you to hunch right over. And I mean reeeaaally hunch. Let your shoulders collapse. Let your chin touch your breastbone. Let everything feel really heavy and really forward.

And now take a deep breath. As deep as you can. 

How does that feel?

Constricted? Uncomfortable? Incredibly inefficient? I’ve just tried this exercise myself and my dog literally came to check if I was ok because of the wheezing that I was doing.

Now let’s try this something else.

Stand up. Place your feet about shoulder width apart. Let the tips of your shoulder blades reach to the corners of the room behind you. Raise the back of your head so that you’re standing as tall as you can. And now breathe. 

How does that feel? 

Powerful right? Strong?

And that’s the first step to being a better singer: better posture, followed by better breath.

For a slightly tangential but really fascinating further look on the benefits of good posture, check out this Ted Talk:

Learn how to sing better lesson - LecutreOwl4.jpg

 Which are you??

BREATHING

So now we know how to stand & sit, let’s look at how to breathe!

Be honest. When someone tells you to ‘take a deep breath’, what do you do?

If you’re anything like most of the world, I bet you inhale and let your chest puff out like a rooster? Right?

Well that's wrong!

When we breathe, we want to inhale as low into our bodies as possible. That means rather than breathing into the chest, we breathe down to our belly buttons.

You see when we breathe into our chests (otherwise known as ‘vertical breathing’) we limit the amount of breath that we can inhale, because the size of the chest cavity is simply not big enough for our needs– it’s not fit for purpose!

Now compare this to breathing deep down into your belly… Unlike the chest, the belly expands much further outward with the inhalation, as well as to the sides and rear – and of course it’s travelled downwards through the body to arrive there! So much more power!

We call this type of breathing diaphragmatic breathing, for the simple reason that to breath this low, we have to recruit a handy sheet of muscle that the majority of us know little to nothing about….


THE DIAPHRAGM

Below is a representation of the diaphragm in the body:

I know! Weird right?! Why are we getting so hopped up about this odd jellyfish thing? Well it’s because it is absolutely vital for proper breathing.

That pink jellyfish is actually a sheet of muscle that works like a bellows in the body to suck air in, and it does that by contracting downwards – as shown in the diaphragm sorry diagram below:

This is the optimum way for our body to breathe and if it’s the optimum way for our body to breathe, then it’s the optimum way for our bodies to SING!

How can we tap into this powerful and correct way of breathing? Especially if we’ve conditioned ourselves into ineffective, unhealthy breathing for a rather long time? Have no fear my friend – I’ve got just the exercise for you…

DIAPHRAGMATIC BREATHING EXERCISE

  1. Lie down on the floor with legs hip width apart, feet semi-supine.

  2. Place a heavy-ish object [such as mobile phone or hard back book] on your belly button

  3. Breath low, into the object and aim to move it up as high as you can with the inhalation, and down as low as possible with the exhalation.

  4. That power that you feel in your tummy is you diaphragm – you’re now breathing properly! Let’s progress a smidge further…

  5. After a couple of minutes solely focussed on moving your object of choice up & down using your diaphragm, then add a count on to the breath of: in for 4, hold for 4, out for 8, hold for 8 [aaaand repeat].

  6. When comfortable, move the counts up by one, e.g.: in for 5, hold for 5, out for 9, hold for 5.

  7. Length of the count is good, but more important is the integrity of the exercise. We’re looking for a full volume of air in, and then every single drop of breath out. All being powered by the diaphragm and lower stomach muscles.


Once you’ve got this exercise down, it’s time to try it standing! Simply perform the above exercise standing in the proper posture that we discussed earlier in the article! Instead of a heavy object, simply press your hand against your tummy and breath there. How does it feel? Strong?! Great! In which case…

…Let’s take a look at the next fundamental to take your singing up a notch!


RESONANCE

So you know how to stand.

You know how to breathe.

But do you know how to… 

…hum?

Well compadre, that is the next step or this journey, so let’s get ready to vibrate. Remember our definition of singing that we wrote for the Hull English Dictionary:

“…the mobilisation of breath in the body combined with manipulation of the vocal organs, namely the vocal folds, resonant cavities, and lips to create words, sounds, or song…”

Oh baby, feel the friction in the airwaves. Let’s take a moment to think about what a sound is.

When we play the violin, we have 4 strings. To make sound using those strings, we can either pluck them using our fingers to make a short sound, or we can draw a bow along the string to make a longer, sustained sound. It is the friction created between the bow and the string that makes the sometimes pleasing sound of the violin. If the pressure from the bow is strong we get a louder sound, and if the pressure from the bow is soft we get a quieter sound.

Now that concept is the essence of how we produce sound in our bodies (or our instrument) too – except our bow is the breath, and our strings are our vocal folds.


THE VOCAL FOLDS

Check out the diagram below – you can see the vocal folds highlighted in green, located in the larynx.

And below you can see a laryngoscopic view on the right:

Learn how to sing better lesson - LecutreOwl2.jpg

When our breath moves through these folds - depending on how we manipulate them – they create vibrations, which in turn become sound, which in turn we convert into a karaoke smash hit!

For an in depth (and I mean reeeeaaallly in depth) look at the vocal folds, check out this video:

RESONANCE EXERCISE

So. Our foundation in terms of resonance depends on how we can manipulate our vocal folds in combination with the breath. And therefore to be the best singers we can be, we need to become intimately acquainted with our resonance. Lucky for you, we’ve got just the exercise to send you on your way.

  1. Lie down on the floor, assuming the ‘semi-supine’ position.

  2. Take a moment to breathe deeply to your diaphragm, remembering to let the belly expand as high as possible with the inhalation; and to drop as much as possible with the exhalation.

  3. Now with the next breath, make the sound ‘Mmm’. Keep your mouth shut, but your jaw relaxed. Repeat, and keep making the sound on the outbreath.

  4. Carry on with this, and now begin to mindfully examine where that resonance feels like it’s occurring. Is it in the mouth? The nose? The forehead? The chest? Wherever it is is totally fine, for the moment just notice it.

  5. Now, continuing to hum on ‘Mmm’, I’d like you to take that sound and make it as low as possible, both tonally and physically. To help with this you can place your hand on your chest. Breathe here a few times.

  6. Next, I’d like you to try and place the hum in your throat! Again, if it feels useful, try placing your hand/s over the larynx and send the hum here for a few breaths.

  7. Now try sending the hum to the lips. 3 breaths here.

  8. Now try sending the hum to the nose. 3 breaths here.

  9. Now try sending the hum directly between the eyes. 3 breaths here.

  10. And finally try sending the hum to the very, very top of the head! Why not do three breaths!


How did that feel? I personally find this an AMAZING exercise to use as a warm up before I sing, but also with my students to increase vocal range in a really gentle way! I promise you if you do this exercise every day for a week you’ll be blown away with the difference in you singing ability!

CONCLUDING THOUGHTS

And that’s all for today folks! Three very workable fundamentals that are guaranteed to take your singing to the next level. 

Try implementing these exercises & techniques into a daily practice, and see how you progress over a couple of weeks! 

Until next time!


Gavin Swift is a film and media composer based in London, England


Piano Scales Mark II

Piano Scales Mark II

Well howdily doodily virtuosos. How are ya?

In todays article we’re going to be looking at Piano Scales: Mark IIThis Time It’s Personal.

You might remember an utterly sparkling and frankly luminescent article from this series already focussed on the scales of the piano (you can see that here: Piano Scales), which covered the major scale pattern (that’s major as in major, not just the important ones), the chromatic scale pattern, and the three types of minor scale patterns. Man that was a great article. I’d love to shake the fingers of whichever maestro composed that badboy.

‘So why Mark II?’

Hey! The title is Mark II – This Time It’s Personal, and the reason that we’re doubling up is because actually, there are a lot more scale patterns out there that would be great fun to learn.

Piano Scales

By: Gavin Swift


Introduction: 

A wise man once said:

Let’s talk about scales, baby – 
Let’s talk about you and me,
Let’s talk about major, minor,
Pentatonic, and blues baby,
Let’s talk about scales
Marcus Aurelius (1)
 

Man that guy was so wise. Howdy! Today we’re going to be covering and discovering the scales of the piano!

By investigating this crucial element of musical theory, we’re able to better compose our own music, and able to better understand the music of others that we might be essaying to learn. Scales are also the OG of finger exercises and training if you’ve got a bit of a Evgeny Kissin type dream going on (I’m personally trying to model his hair) and will teach you the curves and crevices of the piano keyboard in the most beautiful way!

So, if you’re all set to learn, let’s meet at the piano and get stuck in!

What are piano scales?

My friend, you’re not ready yet. First let’s answer:

What are scales?

Great question. A scale is simply a collection of notes played in a particular (usually consecutive) order. We often refer to scales by the key that they belong to – a key being a collection of notes where a certain tone feels like the central or home tone. For example, in both C-Major & C-Minor, the central or home tone is C. We also call that central tone the tonic. Or, just to make this super accessible for everyone, we might number it as ‘1’.

Take a look at the image below:

CMAJ 1.jpg

Now every white note on that keyboard belongs to the key of C-Major. We’ll use this to jump into our study of…

Major Scales

If you were to play:

E, D, C, D, E, E, E, D, D, D, E, G, G (that stone cold classic Mary had a Little Lamb)

You would be playing a tune in the key of C-Major.

But you would not be playing a C-Major scale. The C-Major scale has to be the notes played in the order below:

Piano Scales Scales Degrees - LectureOwl.jpg

Or that sequence in reverse – so ascending or descending. Which brings us to some of that sweet musical etymology we so love to explore! The word scale comes from the Latin scala  meaning steps, staircase, or ladder. So we can think of a scale in this way! In the C-Major scale above, the first and last rungs of the ladder are C, our home rungs, everything between those guys are essential steps

So what’s a piano scale?

Yes. You’re ready now. A piano scale is just the above information applied to a piano keyboard. Maybe I was wrong ok?! Maybe you were ready!


What other types of scales are there?

The short answer is, there are many different kinds. The good news is that to learn a scale, learning the individual notes is less important, than learning the pattern of each scale. To illustrate this, let’s look at our friend C-Major once more:

Piano Scales Degrees Example - LectureOwl.jpg

And just in case you’re not sitting at a keyboard:

Piano Scales Major Scale Keyboard Example - LectureOwl.jpg

Now we already know that the C Major scale consists of every white key on the keyboard played in consecutive order. So playing every white note going up and every white note going down on the keyboard above would give us a great example of the C Major scale

Now notice above, that between certain notes (C&D, D&E, F&G, G&A, A&B) there are black notes, but between other notes (E&F, B&C) there are no such obstructions. These black notes are the sharps (#s) and flats (♭s) of the keyboard.

We call the distance between a  white note and a black note (say, C to C#) a semi-tone, or half-step, and we call the distance between two notes obstructed by a half-step (for example C to D) a whole-tone, or whole-step. So two half-steps = one whole-step.

Keeping our eyes on the diagramatic prize above, we can see that the pattern of the C Major scale clearly goes:

Piano Scales Steps Example - LectureOwl.png

Now that pattern:
1 whole-step 2 whole step 3 half-step 4 whole-step 5 whole step 6 whole-step 7 half step 8

Now wait for it…

…That’s the pattern of every single major scale every created on this sweet planet called earth. Whoa.

Don’t believe me? Check out this E♭-Major Scale:

Piano Scales Eb Major Scales Example - LectureOwl.png

 So what’s the pattern here? Follow along with me:

E♭ – F = whole-step; F – G = whole-step; G - A♭= half-step; A♭-B♭= whole-step; B♭-C= whole-step; C-D= whole-step; D-E♭ = half-step. 

Didn’t I tell you! Isn’t music glorious?! Now a quick bit of info about Major scales:

  • Major scales are generally described as sounding ‘happy’ or ‘positive’.

  • The reason that they’re called Major scales, is because these scales consist primarily of larger, or Major-er intervals (an interval is the posh word we use to describe the distance between notes).

Now for your first assignment!

Assignment 1:

  • Sit down to the keyboard (I love you if you’re already there – if you’re not, I still love you)

  • Try to play every major scale by starting at all the different notes and applying the major scale pattern. You might find it easiest to work through all the white keys before moving onto the black ones – or maybe you’d like to move chromatically. Either way, take the time to practice and bed in this awesome scale pattern!

The Chromatic Scale

Now logic probably says that following on from the Major scale we should look at the minor scales – but not me! I laugh in the face of danger! Who needs logic anyhow! (2)

The chromatic scale is cool. The chromatic scale can start on any key (as can any scale really), but consists only of half-step intervals! So a chromatic scale starting on C on the diagram below:

Piano Scales Chromatic Scale Example - LectureOwl.jpg

Would then play C#, followed by D, followed by D#, and so on, until you reach the very top C having played every single note in between. Pretty awesome right?! Here’s how a chromatic scale looks when it’s notated:

Piano Scales Chromatic Scale Notation Example.jpg

The above shows a chromatic scale starting on C both ascending and descending for one octave. 


Assignment 2:

  • Get thee to a piano keyboard!!!

  • Start on the lowest note available at that keyboard – if you’re at full size piano this will most likely be A.

  • Play a chromatic scale ALL THE WAY TO THE TOP of your keyboard!

  • What goes up must come down! Now play a chromatic scale ALL THE WAY DOWN your keyboard!

  • Easy Rachmaninovyou’re sounding great!


The Minor Scale(s)

Oh no! Why is there an S in parenthesis?!

No, don’t be afraid!

I’m kidding, be afraid!

No really don’t be afraid! Although when you hear this scale (or scales as we’ll see) you might get a twinge of fright! While Major scales are associated with positive, happy, sounds, minor scales are generally associated with negative, or gloomy sounds – sometimes they can also sound downright scary! Don’t believe me? Check out this performance of Bach’s Toccata & Fugue in D minor – which essentially begins with a descending D-minor scale!

Now. 

Let’s deal with that parenthesis.

You see, there is not one, not two, but THREE variations of the minor scale! (Play first phrase of Toccata & Fugue in D minor for scary effect there)

The three variations are:

  1. The Natural (or ‘Aeolian’) minor scale

  2. The Harmonic minor scale

  3. The Melodic minor scale


The Natural Minor Scale

Iiiiiiinnn tthhhheee red corner! Is the natural minor scale. Let’s take a look at the A minor natural scale. Which, lucky for us, consists entirely of white notes, just like C-Major!

image9.png

Or in notation, it looks like this:

image5.jpg

The pattern for this scale is:

(Tonic) Whole-step, half-step, whole-step, whole-step, half-step, whole-step, whole-step (tonic).

So actually, this scale has the same number of half-steps as any old Major scale! What’s changed is there position in the scale, happening at the second and fifth intervals. Groovy. Now let’s peek at…

The Harmonic Minor Scale

Ok. So let’s stick on A minor and check out the A harmonic minor scale:

image7.jpg

Or in notation it looks like this:

image6.jpg

Ok! So who can spot the difference here?!

I’m sure you’ve all seen it, but I’ll be captain state the obvious. What the hey-ho is that G# doing there?!

I’ll tell ya.

In a harmonic minor scale we raise the 7th note by a half-step, essentially increasing the interval between notes 6 & 7 to a distance of 3 half-steps. Whoa! 

Why??? And why isn’t that G# listed in the key signature like you’d expect?

Both very valid questions! If we can let’s answer it with a practical experiment. At your keyboard, play the note G, followed by the note A. How does that sound? Pretty good right? Pretty pleasing? Well hold onto your harmonics, because now I want you to play G# followed by A

…Did you do it? Oh my gosh how did it feel? Did you get that level of oomph that we all know and love? In essence, that 7th is raised because it feels so good to resolve to the tonic or central tone from a raised 7th. Remember, the root of the word harmony in music stems from things literally working better together sonically – i.e. harmoniously. So when we see the word harmonic attached to something in music theory, you can usually bet you bottom B♭ that it’s because it will sound straight up pleasing. That’s also the reason that this is the most commonly used form of minor scale in Western music!

Why isn’t the raised 7th in the key signature? Well, technically because it’s not in the key. Remember, in a key signature, the first note we would mark as sharp (where appropriate) will always be F. And the first note we would mark as flat would always be B. Well looky here! G# is neither of those! Therefore it’s place in this scale is as a function of harmony rather than key. Phew. This is some heavy stuff.

The tone pattern for a harmonic minor scale is as follows:

(Tonic) Whole-step, half-step, whole-step, whole-step, half-step, three half-steps, half-step (tonic).

Rad.

And finally, 


The Melodic Minor Scale

Probably in my top three variants of minor scales this guy packs a major punch (sorry).

In the melodic minor scale we continue to raise the 7th note of the sequence by a half step, but, we also raise the 6th a half step!

Melodic minor scale, you loco!

But the madness doesn’t stop there! Not by a long chalk! You see on the way up we raise (or sharpen) the 6th and 7th notes by half a step, but on the way down we lower (or flatten) them back to the natural minor sequence. Before you spit out your chicken soup all over the keyboard, let’s take a look at it in the form of a diagram. Just cause we’re so cosy with it, we’ll use the A minor melodic scale:

image8.jpg

And as we said, on the way down that F# and G# would become a G♮ and a F♮. To further clarify, let’s see it notated:

image10.png

Muy infuego. Spicy like a curry.

‘But why?!’

Why indeed! Ok, remember how in the melodic minor scale we saw how that G# to A felt soooooo good (*drool emoji*), well that’s because it instructs the ear to the central tone, the tonic of A in this case. When we flatten the 6th and 7th notes on the way down, this leads our ear to the 5th note, otherwise known as the dominant; in this scale the dominant is E.

Now in a scale, the dominant is the centre of primary discord against the tonic, which is a fancy way of saying it feels incredibly good to resolve from E to A, or any dominant to any tonic. So when we flatten the 6th and 7th going down, we get a sonically greater pay off when we arrive at A, because we’ve had another ‘feels so good’ moment (*drool emoji*) at 6 – 5. 

That’s also the reason that this scale is named ‘melodic’! Because that type of phrasing in a melody works incredibly effectively!


3: The final assignment! (3)

  • Go to your keys!

  • Try playing through all of the variations of the minor scales. Sure it might be a big as do on every note (12 available pitch classes multiplied by 3 variants of minor scales…arghh!!! My head is exploding with the maths!!!) but even just doing it for A will teach you a cool lesson.

  • See if you can identify these patterns in any music that you might know and love! I’ll get you started – I love the use of the melodic minor scale in The Beatles (google them) track Yesterday. What other ones can you find!


Conclusion

We’ve covered a lot today! And this is only the tip of the iceberg of scales! We’ll be looking at a few more examples in further lectures, but if you curiosity is simply unquenchable, why not have a trawl of the internet to see what other kinds you can find!

Happy learning! And most importantly, happy playing!!!

For today, remember, every day in life is filled with new assignments. Never has that been truer than in your study of the art of noise.


(1) Marcus Aurelius definitely never said that. But I did. So there.
(2) We all do. I, perhaps, need it the most.
(3) For today, remember, every day in life is filled with new assignments. Never has that been truer than in your study of the art of noise.


Gavin Swift is a film and media composer based in London, England


C Major Scale on Piano

By: Gavin Swift

Introduction

Hi there! In this article we’re going to be examining the wonders and delights of the C Major Scale!

Maybe you don’t know this yet, but scales are one of the best foundations for learning and navigating any instrument you so desire to learn! And the C Major Scale happens to be the best foundation to learn all of the other scales – and believe me, there are many  *said in scary voice*.

No don’t be scared, this journey is fun! And once you’ve got C Major down you are going to find the following guys easy as pie.

So if you’re feeling down to learn, grab your appetite for knowledge and we’ll meet at the piano!

NB: This article will be using the keys of the piano (or any other keyboard you fancy) to illustrate wondrous little beast – but you’ll be happy to know that the knowledge (other than the specific fingering exercises for piano) transfers to any other instrument you like extremely smoothly! Fear not!

In this lesson we’re going to learn:

  • What is a scale? And for that matter what is a key?!

  • What is a C Major Scale?

  • How in the world can we apply this chap in our day-to-day musical lives!

What is a Key?

Here we are again mon ami, at the boarders of music theory looking into a vast jungle of dense knowledge. How will we navigate this unfamiliar terrain? Luckily many explorers before us have trod this path, and they left us lots of handy hints, tips and clues to navigate the way. The first of these is the key, or key signature.

A key or key signature is a group of notes/pitches that generally form the basis of a musical composition. There are some exceptions to this where certain pieces of music are without a key (see Schoenberg), but for the most part, and particularly in pop music, this generalization is true.

Arg! What does it MEAN?!

Well let’s take a look at a keyboard for guidance:

Piano C Major Scale Keyboard Example - LectureOwl.jpg

‘Simba, everything that the light touches is yours’

And everything that is white (i.e. the white keys) on the keyboard, belong to C Major (or A minor – that’s another article. For now just keep thinking *said in a hypnotist’s voice*).

‘But why should all those white notes be regarded as C Major?’

You’re so inquisitive today, and I love it! You’re right you know, there are so many white keys above (A,B,D,E,F,G) – why should this pack belong to C?!

I'll tell ya.

When we call a key ‘C’, or any other of the available letters, we are referring to the central tone, this can also be called the tonic.  So even though, in a C Major scale we have 6 other notes, we ‘hear’ C as the most important note, and all other notes are heard as subordinate to C.

Another way to think about this is to imagine that the central tone, or tonic, is the centre of gravity in a key. When we hear a piece of music using the notes of the C Major Scale, no matter how far away we stray from him, we always feel the pull back to earth – AKA the tonic of C.

GROUND CONTROL TO MAJOR TOM – WHAT DOES THIS MAJOR BUSINESS MEAN ANYWAY???

Ah yes, I’d not forgotten. I promise. Major and minor are words that we use to describe key signatures. The root of these names stems from the intervals between notes in a scale (all coming up don’t worry), but they are easily distinguishable because of the way that they sound. Generally speaking, a Major key is perceived as ‘positive’ and ‘happy’, while a minor key is perceived as ‘negative’ or ‘sad’. 

Let’s take a look at the opening of one of Mozart’s piano sonatas (don’t worry if this looks terrifying, you can get a good idea of this concept by only playing through the right hand part):

CMAJ2.jpg

You can see that we start the piece with none-other than a C. Have a play through of the first few bars  (as I say, right hand only is fine) and see if you can hear that tonal gravity that the C provides. In this context, can’t you just feel the safety and sense of ‘home’ that Mozart uses the C for? Part of the reason that Mozart was such a genius composer was his intricate understanding of keys and how we sonically relate to them. In this piece (and in so many others), he builds you up the cosy little nest of C, and then plays a game where he sees how far away from it he can take you before bringing you home. Dankeschön Wolfgang!

And of course, this leads us into the scary question:

What is a scale?

Ok, hold on to your hobbits. A scale is the term we use to describe the collection of notes found in a key, played in a consecutive order. Remember this guy:

Piano C Major Scale Keyboard Example - LectureOwl.jpg

We said that every white note on the keyboard above belongs to the C Major Scale, and that’s the truth! So the collection of notes that comprise the C Major Scale are:

C, D, E, F, G A & B

Played in a consecutive order!

HOLD UP

I wanna drop a truth bomb right here. What does scale mean anyway?

I’ll tell ya hombre.

Scale comes from the Latin scala, meaning steps, staircase, or ladder. So we can think of a scale in this way! The Cs at the top and bottom are our desired ends (and as we saw with Mozart, it feels real good to get there), and the other notes are all the rungs of our ladder! They don’t feel as good to be in as C, but arriving at C after taking that trip is just the greatest.

So that’s a scale, a collection of notes, found in a key, played in a consecutive order. *hypnotist’s voice again* it would be a good idea to remember that forever.

Scale degrees

YES. AT LAST. You might remember that not so long ago, I described C as the tonic (central tone) of a C Major Scale. I know what you’ve had on your mind since all that time ago, and I’ve got great news for you oh J.S.Bach-a-like:

THE OTHER NOTES IN THE SCALE ALSO HAVE COOL NAMES BEYOND THE LETTERS ASSIGNED TO THEIR PITCHES!

By the beard of Brahms that felt good.

Yes, it’s true! You can think of scale degrees as the rungs of our imaginary ladder. Below are the scale degrees in a C Major scale:

C = 1 = TONIC
D = 2 = SUPER TONIC
E = 3 = MEDIANT
F = 4 = SUBDOMINANT
G = 5 = DOMINANT
A = 6 = SUBMEDIANT
B = 7 = LEADING TONE

*whispers*  ‘if you can, learn these too...’

Pretty cool non? A great little exercise to do right this second (or as soon as you get to your keys) would be to play through each of these intervals always returning to C (i.e. C –D – C; C – E – C; and so on). The best way to learn these intervals and to get an understanding of the power of the central tone is by playing or hearing them, so give it a bash! 


The Major Scale

OK! So we now know:

  • What a key is.

  • The difference in the sound of major and minor keys

  • What a scale is, and it’s degrees

  • We’ve even looked at the C Major scale!

So now we’re going to smoosh all this knowledge together and learn what exactly makes a Major scale.

Let’s look again at our keyboard:

Piano C Major Scale Keyboard Example - LectureOwl.jpg

Now we already know that the C Major scale consists of every white key on the keyboard played in consecutive order. So playing every white note going up and every white note going down on the keyboard above would give us a glistening example of the C Major scale. If you’re sat at the piano right now why not give that a go?!

Now notice above (and as you play), that between certain notes (C&D, D&E, F&G, G&A, A&B) there are black notes, but between other notes (E&F, B&C) there are no such obstructions. These black notes are the sharps (#s) and flats (♭s) of the keyboard.

We call the distance between a  white note and a black note (say, C to C#) a semi-tone, or half-step, and we call the distance between two notes obstructed by a half-step (for example C to D) a whole-tone, or whole-step. So two half-steps = one whole-step.

Keeping our eyes on the diagramatic prize above, we can see that the pattern of the C Major scale clearly goes:

Piano C Major Scale Notes Example.png

Now hold onto your helmets, hear comes the most enormous truth bomb ever thus dropped in a Lecture Owl article of learning:

*truth bomb voice* 

THAT IS THE PATTERN OF EVERY MAJOR SCALE

Pretty cool right? If you know one, you basically know them all! And in fact, lucky you, that is what my next article will cover. I know, I know, you can’t wait! You’re so enthralled by the wonders of knowledge! But simmer down Kemosabe, (or KEY-mosabe?!), before we get there we’ve got to put C Major to bed.

Before we look into some fun, practical ways we can apply this, check out how C Major is written when it’s in a score

Piano C Major Scale Degrees Example.jpg


OK, So I’ve learnt the C Major Scale – What now?!

Well first off the bat, I think it might be a pretty good idea to give it a play! If you’ve got a keyboard (or any other instrument) handy, work through the diagram above. Once you get to the top of the scale, come back down! Wow! Doesn’t that feel satisfying?!

Now for some brownie points, as you play each note of the scale, say, or sing the scale degrees, first numerically (1,2,3,4,5,6,7,1) and then with the cool names we learnt earlier (tonic, supertonic (my favourite scale degree name btw), mediant, subdominant, submediant, leading tone, tonic) – this is a great way to start teaching yourself this cool knowledge!

Now that we’ve learnt the scale and it’s degrees, I’d really like us to learn the specific fingering of the C Major Scale for the piano. Why? Because this fingering is also the foundation for all the other scales (with a few notable exceptions – I see you B Flat Major!). Knowing correct fingering means that you’ll be able to zip up and down in this scale and sound seriously awesome. It also means that you’ll have a great bit of keyboard geography under your fingers to start writing your own music in this key signature. If you’d like to do that, that is. I would like you to do that. So… Please?

OK, let’s go! The diagram below shows the scale of C Major with the most efficient fingering – let’s take a peek!

Piano C Major Scale fingering example - LectureOwl.png

‘So, what do those numbers above mean? They’re not scale degrees!’

Well spotted! They are in fact an indication of the fingers to use in this scale! They mean:

 1 = thumb, 2 = forefinger, 3 = middle finger, 4 = ring finger, and 5 = pinky

So in the right hand, our pattern is: C=thumb, D=forefinger, E=middle finger, F= thumb (slide it under like Indiana Jones), G= forefinger, A=middle finger, and C = pinky! To come down simply reverse (with the middle finger leaping the thumb at F to E).

And the left hand we go: C = pinky, D= ring finger, E = middle finger, F = forefinger, G = thumb, A = middle finger (leap it over the thumb!), B = forefinger, and C = thumb! To come down, simply reverse this order (with the thumb sliding under the third finger Indiana Jones style at the transition from A to G).

And there you have it! The C Major Scale Everybody!

Now you’ve learnt it, why not practice it!  Why not see how many octaves you can go up and down the piano?? Or why not write your own tune! The keyboard is your oyster my friend! 

Until next time!


Gavin Swift is a film and media composer based in London, England


The Guitar Fretboard Notes

The Guitar Fretboard Notes

There are 12 notes in western music. Usually only a certain number of those notes are used in a scale. For example in a C major scale there are 7 notes. It is very important as a guitar player to know where each of those notes are on the guitar fretboard, so that you can play within a preset scale and create melody.